One of my favorite October traditions since its release has been playing The Annual Ghost Town Pumpkin Festival created by adamgryu who you may be familiar with as he also created A Short Hike, another game I really love.
The Pumpkin Festival is free to play, but you can pay $2 (or more) to get a bunch of bonus hats for your Ghost to wear. Regardless of if you get the paid version or not, you can customize your Ghost’s eyes and mouth. Your Ghost’s “name” is randomly generated each year though. Besides being able to pick a hat, all players can earn Pins in the game which was something introduced in 2024. These Pins are going to be the main focus of the walkthrough.
Obviously though, while we play as a ghost, this is a Pumpkin Carving game. You can pick any pumpkin on the cart of the main menu (or enter and exit for the cart to refresh new pumpkins) to carve it. You can make up to 5 Pumpkins each year and can place them around the Pumpkin Festival– there are only so many spots per “world” though so if one world is full, you may need to switch to a different one. You’ll know if you can place your Pumpkin in a spot if there is a glowing circle on a surface you try to place it on. (As a note, you can pick to place Pumpkins by opening the menu and clicking “Place Pumpkin”. The third option, Visit Alternate Universe allows you to switch servers. Hitting the Lightbulb puts the game in “daytime” mode– you can also hit shift to toggle between day and night. The 4th icon, the ribbon, lets you award one Pumpkin a day with a special ribbon).
Finally, you can only place pumpkins and earn pins while big. If you are a tiny ghost with their superb flying abilities, you will not be able to do these things, but it could give you a nice view for where you may want to go next. Don’t forget you can press “F” to toggle a flashlight.
With all that out of the way, let’s get to the actual puzzles and pins. Not every pin has a puzzle associated with it– sometimes, it’s just about getting to a certain area. I’ll be going in the order I generally explore the map, but here is a quick navigation system as well:
- Barn of Terror Pin
- Nature Lover Pin
- Obby Tower
- Haunted Hayride
- Maze of Madness
- Aliens
- Parasol Corporation
- Theater Friends
- Theater Dog
- Haunted Mansion
- The Moon
- The Rave
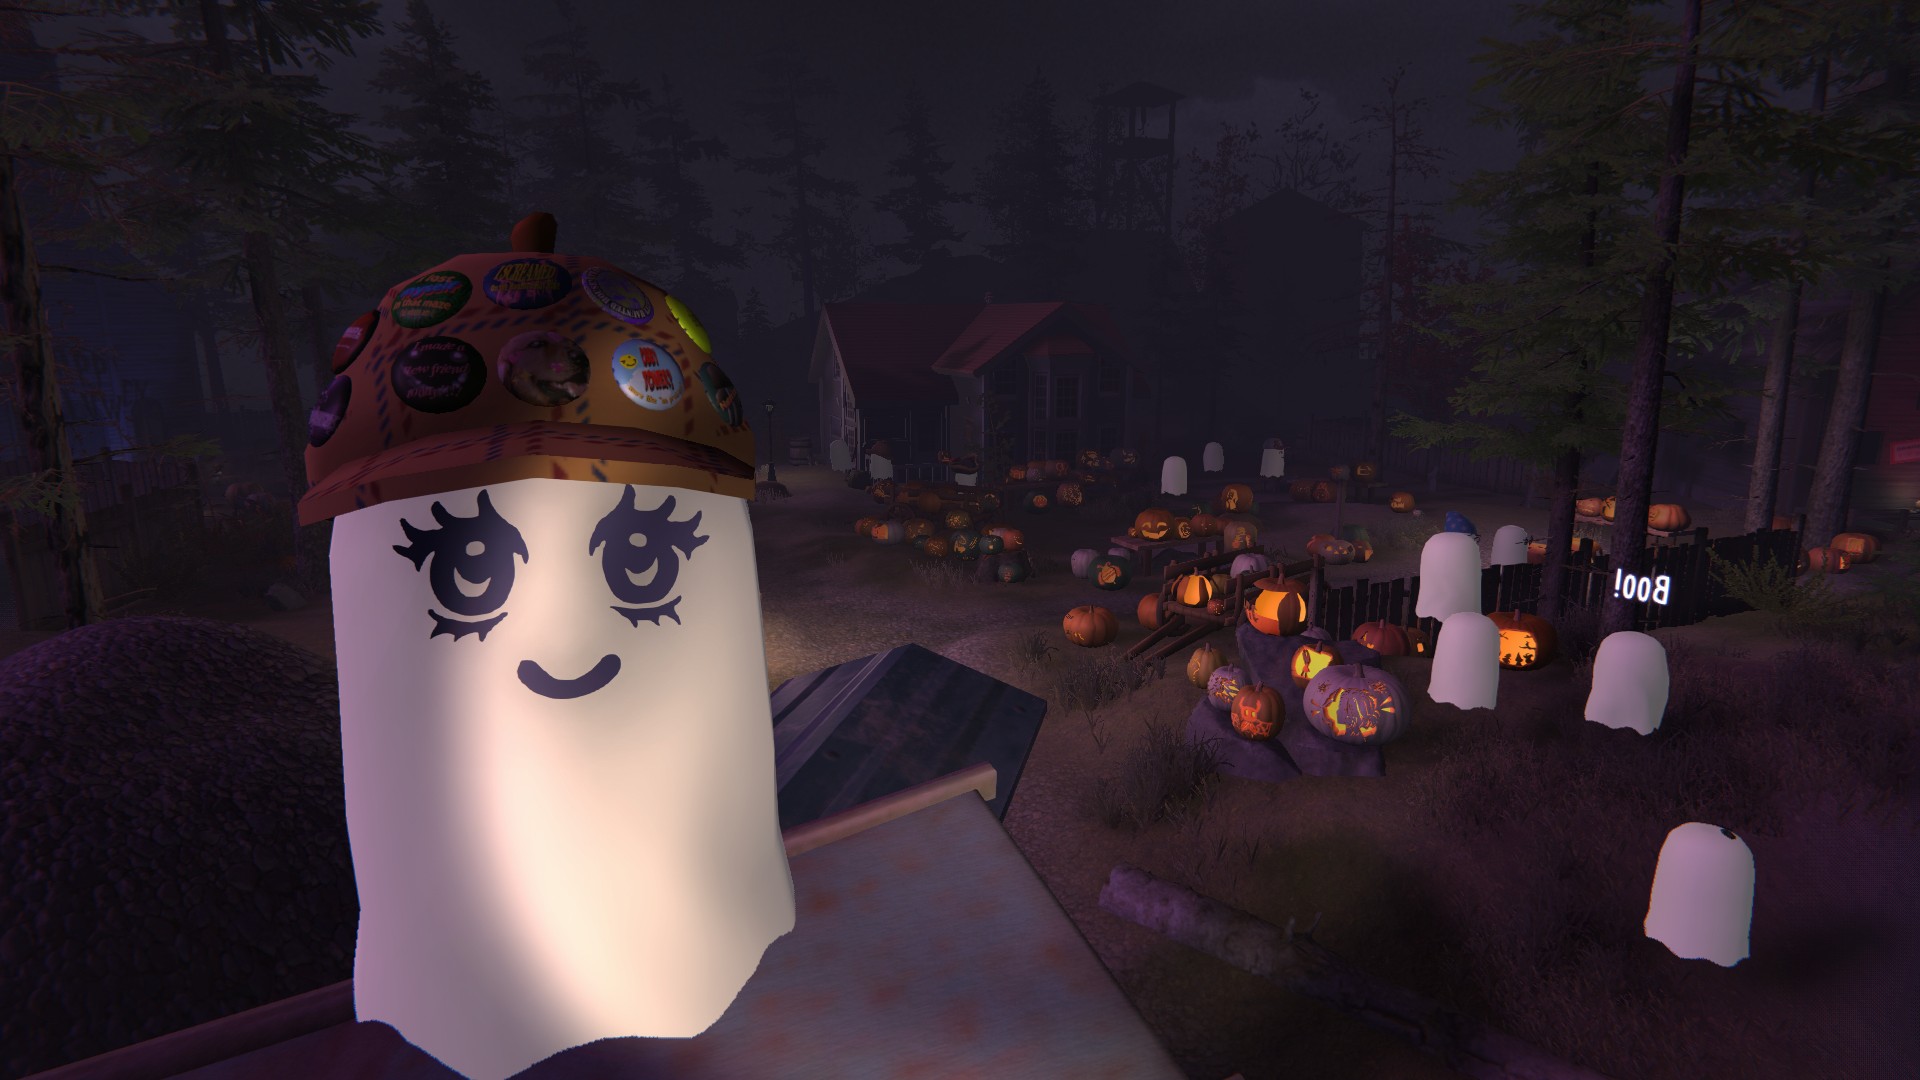
As soon as you load in, you’ll be next to some Pumpkins on a pedestal (these are selected randomly from all Pumpkins placed each day), a bulletin board giving you an overview of the event, and tons of Pumpkins or well, maybe lots of open space depending on if you logged in super early.
I will be giving a vague explanation first followed by more precise instructions (and essentially the answer) if you don’t want to think about it.
Barn of Terror Pin
If you take the path to the right, you’ll find The Barn of Terror with a “DANGER” sign on the wall. Inside is a pin you can get.
Head straight to the back and it is under the giant Skeleton.
Nature Lover
This time, we’re heading to the Mansion on the left. Simply continue straight from where you load in and then turn to the left where you can see a cut-out with a ghost and a Skeleton with a Pumpkin head. The building has “Happy Halloween” on it with some ghosts flying on the walls. You just need to get inside for this pin.
Head to the back of the house to find some Mushrooms by a small hole. Clicking the Mushrooms will make you tiny and allow you to go through the gap. All bundles of these Mushrooms do the same thing– clicking them will make you small if you’re big and vice versa.
Once inside, click the Mushrooms right ahead to become big and then you can find the Pin box for the Nature Lover Pin.
You’ll need to touch the mushrooms again to get out the way you came!
Obby Tower
If you continue going straight, behind the small blue house with a red roof, you’ll see a looming tower overhead. This is the Obby (short for Obstacle) tower and it’s essentially a big jump puzzle. This is probably one of the harder pins to get, if not the hardest depending on your strong suits.
You’ll have to jump up steps, jump across parts, and essentially slowly go around the tower as you make your way up. There isn’t really a checkpoint, but there is a part halfway up that you can kind of relax on and is a bit harder to fall back down to the start from once you get there. I recommend using your cursor to help with aiming.
You can watch me do it here, but here are some notes for where I see people usually struggle figuring out what to do:
-At one point, you’ll hit a long platform with a pillar. Go around the pillar to jump across. You then want to jump on the hanging square to get up to the next platform.
-Once again, you’ll have to jump across but then becomes the first really challenging jump: The small platform on the backside of the pillar.
-You will then continue to an even smaller platform around the corner. It’ll then be a leap of faith across, but there is a platform to stop you from falling over it.
-You’ll have a few more long jumps before reaching the big spot in the middle of the tower. You’ll then have more steps up the wall before needing to do a jump to the opposite end frame. You’ll then move around slowly to jump on the logs.
-Once across the logs, you’ll follow the thin wooden parts around. I highly recommend falling to the one to the right once it’s right next to you and slowly making your way forward over jumping. Don’t worry about the rope– you can walk through it.
-When you finally get to the end of the last stick, jump to the top! You can find your pin there.
If you’re still really struggling, there is something that unlocks through the Aliens Pin that may let you quickly skip the obstacle course to the top, but I’d still recommend doing your best to do it properly if you can!
Haunted Hayride
Going back to the path, make your way to the barn in the distance. You’ll see a little bench with a sign that you can wait there for the Hayride. Once the tractor shows up, simply jump into the back. Or you can technically run in on foot, but anyway…
You should see the pin box as you finish up the ride– make sure to jump out to grab one!
(Note: Unrelated to the pin, there is a fun easter egg with the sign if you switch to daytime mode!)
Maze of Madness
They give you a map right at the start if you want, but a lot of people will also put down Pumpkins to help you find your way as well. Do not click a Gnome until you are ready to leave. They will send you back to the start.
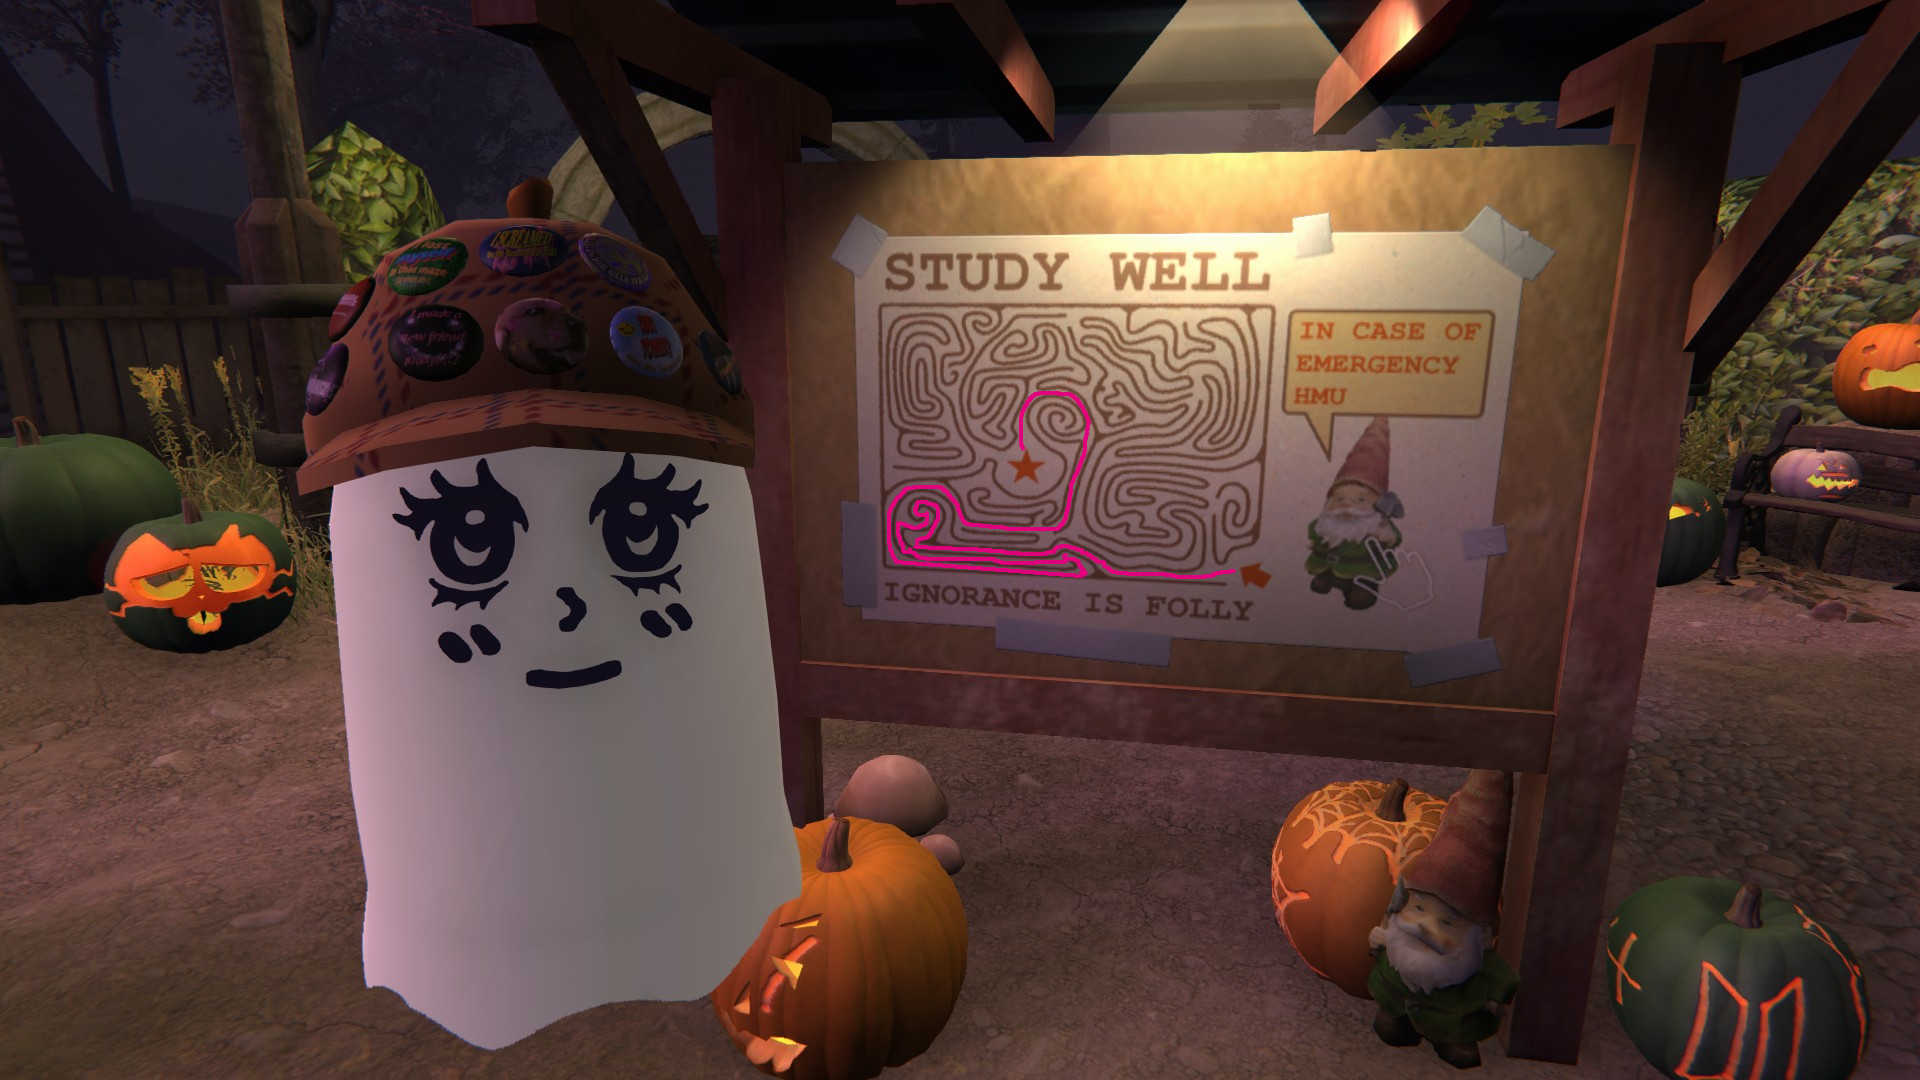
You just need to go to the center of the Maze and climb the tower (don’t worry, this one has stairs) to get a pin. The pin isn’t at the very top– you should see the box before that. Some people will jump on pumpkins to get on the hedges of the maze to get across easier.
If you need more help:
-Keep going straight until you hit a fork.
-Then take a left and keep going forward (You should see a cauldron at one point, but you can keep going around).
-When you hit a point where there are two different paths forward, take the left.
-Keep going until you see three paths– take the second one [from the left]. Just keep following it forward (there may be another fork at one point– still stick to the left) and you’ll find the tower.
As mentioned, you’ll see the pin on the platform before the last steps to the top. The closest Gnome to click to quickly teleport out can be found by taking the path to the left of the archway you entered through and immediately taking another left. Follow that path to the dead-end to find a Gnome to send you back.
Aliens
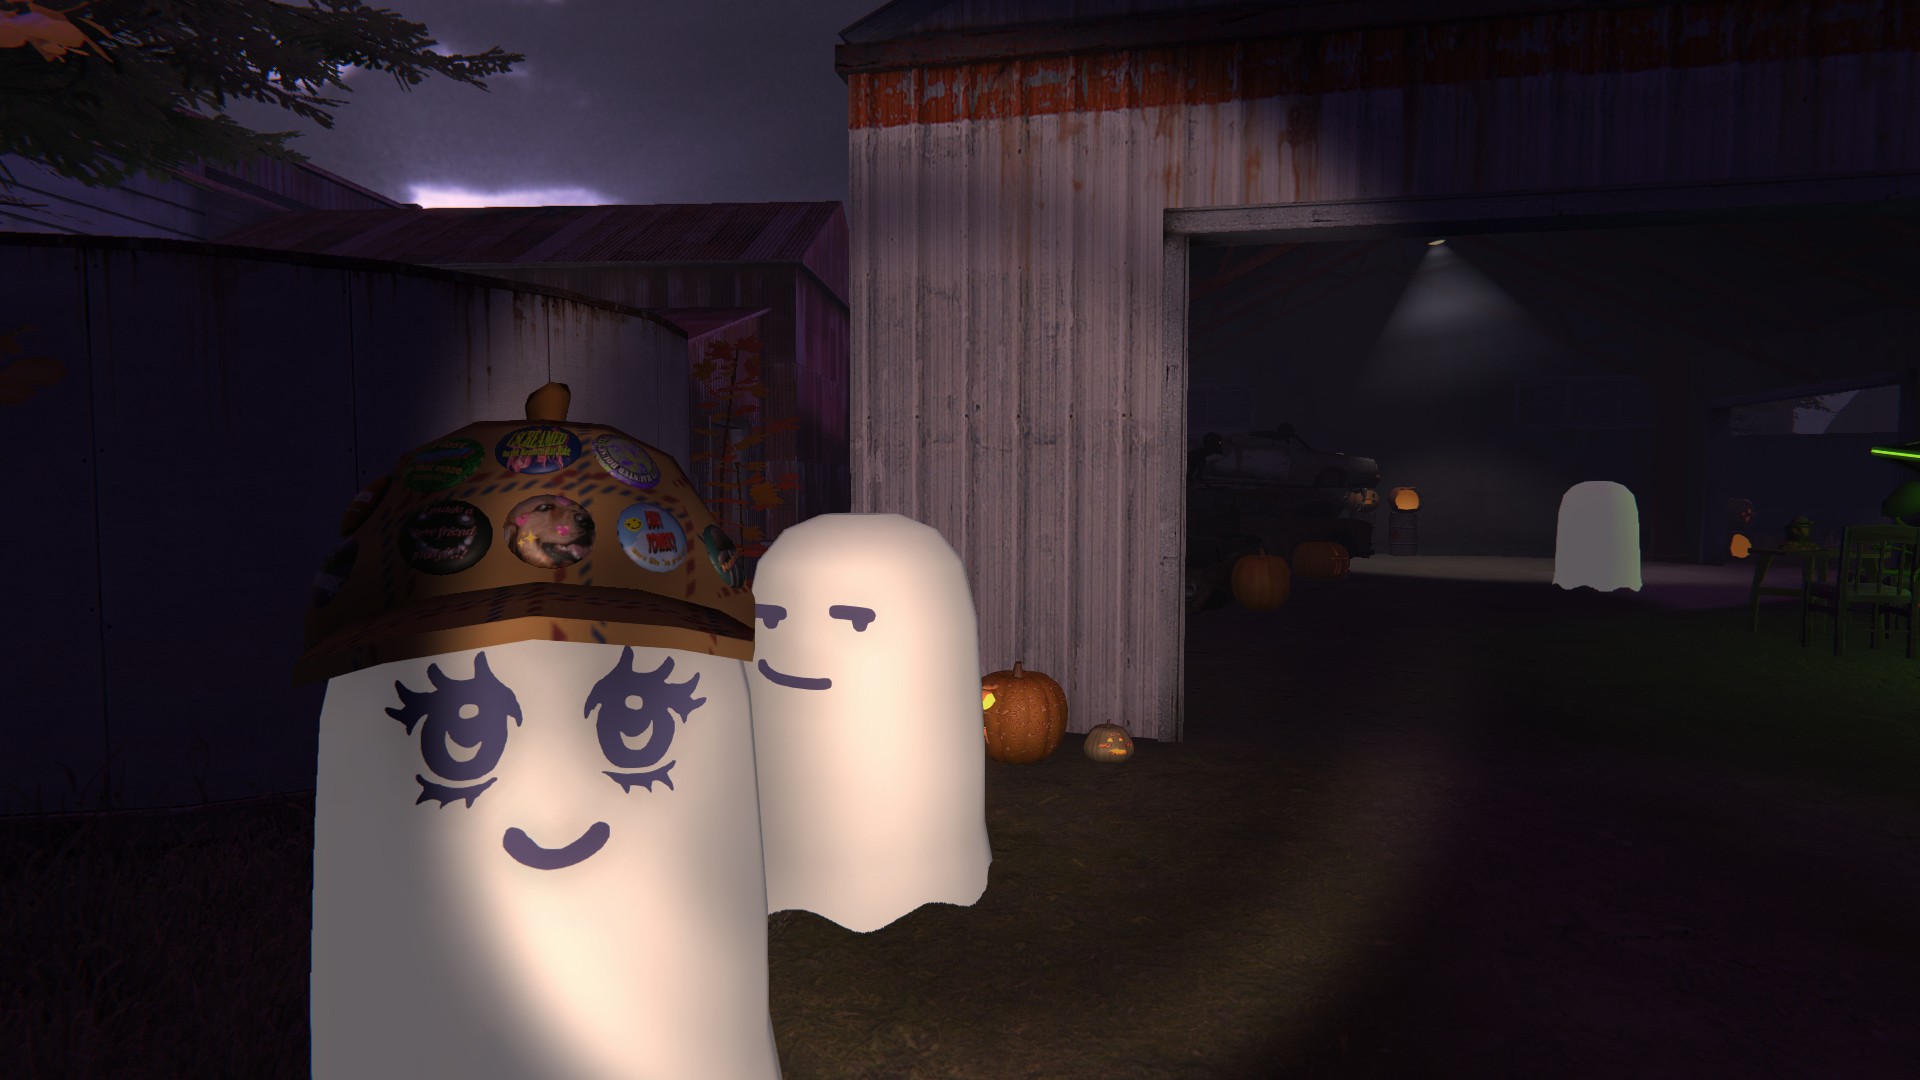
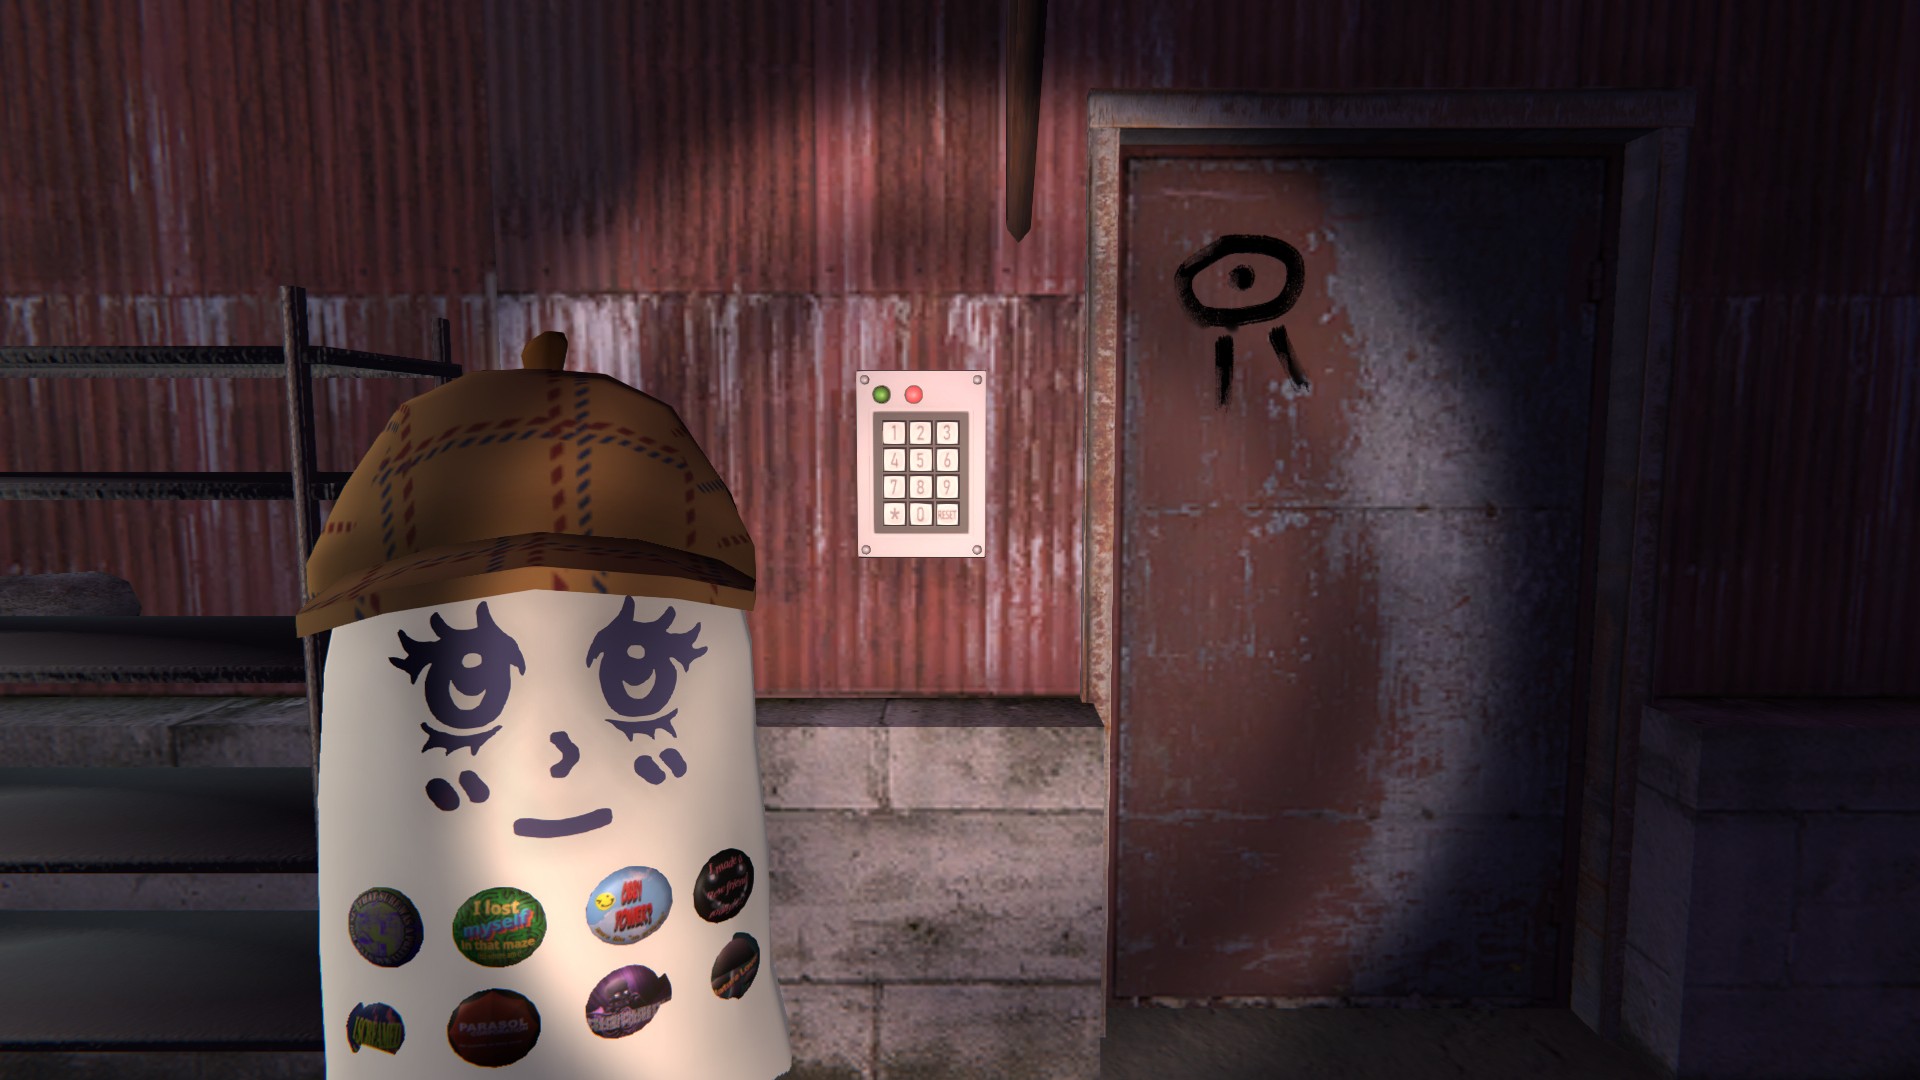
Head to the back end of the Hayride and going behind the Alien area, you’ll find a red building with an open door featuring a keypad and a weird symbol on a locked door. Unlike most other puzzles, this one actually requires going to an entirely different area for the answer.
You need to head into the Town area (essentially, the opposite way when you load in). Somewhere in town you’ll find the information that will give you the code for the keypad, indicated by a matching symbol.
If you can’t find it:
-Continue heading straight into town.
-Take a right when there is a turn.
-Once again, follow the street until you see an arch to your left with an open doorway. Bats are hanging from it.
-You’ll see an “Aliens are not real” sign with the matching eye symbol.
-The text “See for yourself” features four numbers.
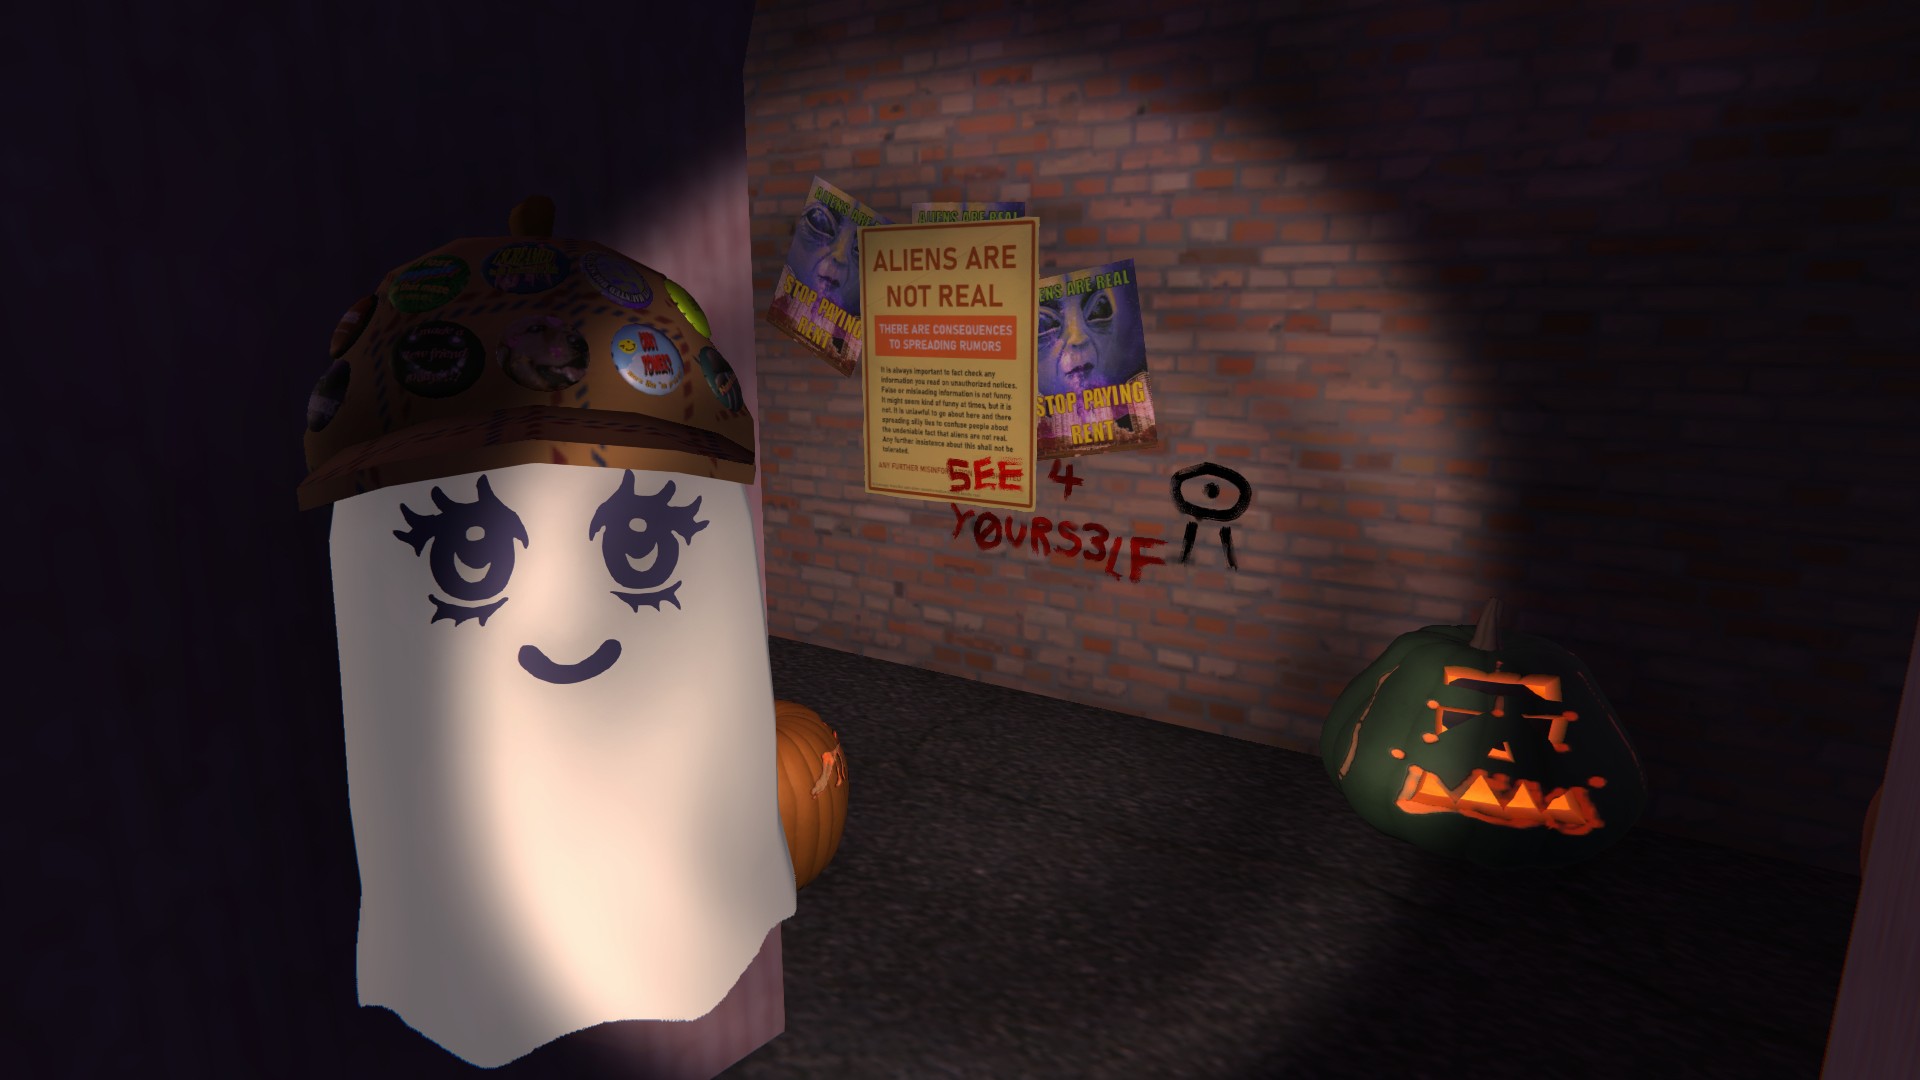
The code is 5403 to unlock the door. Head back to put that in the keypad to open the door. You can find the pin in this room, though, there is something you can interact with for a bonus as well…
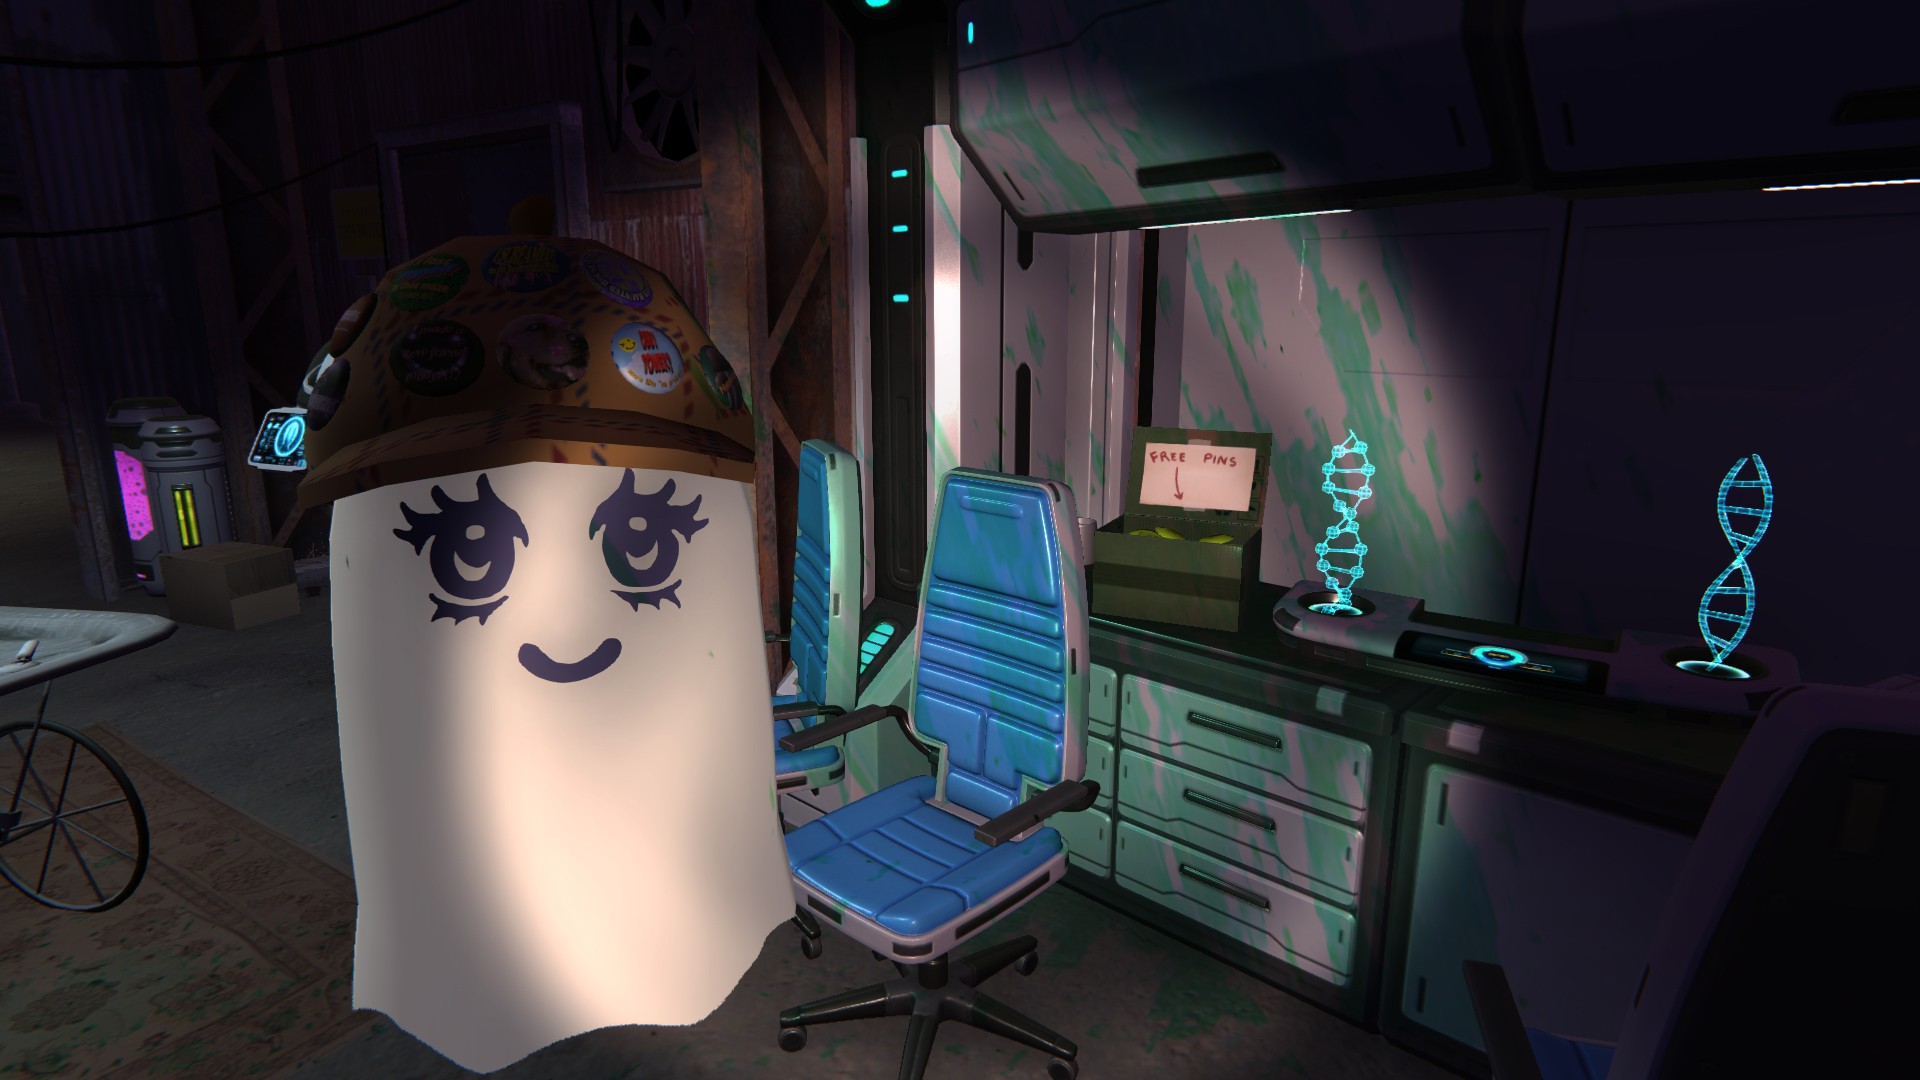
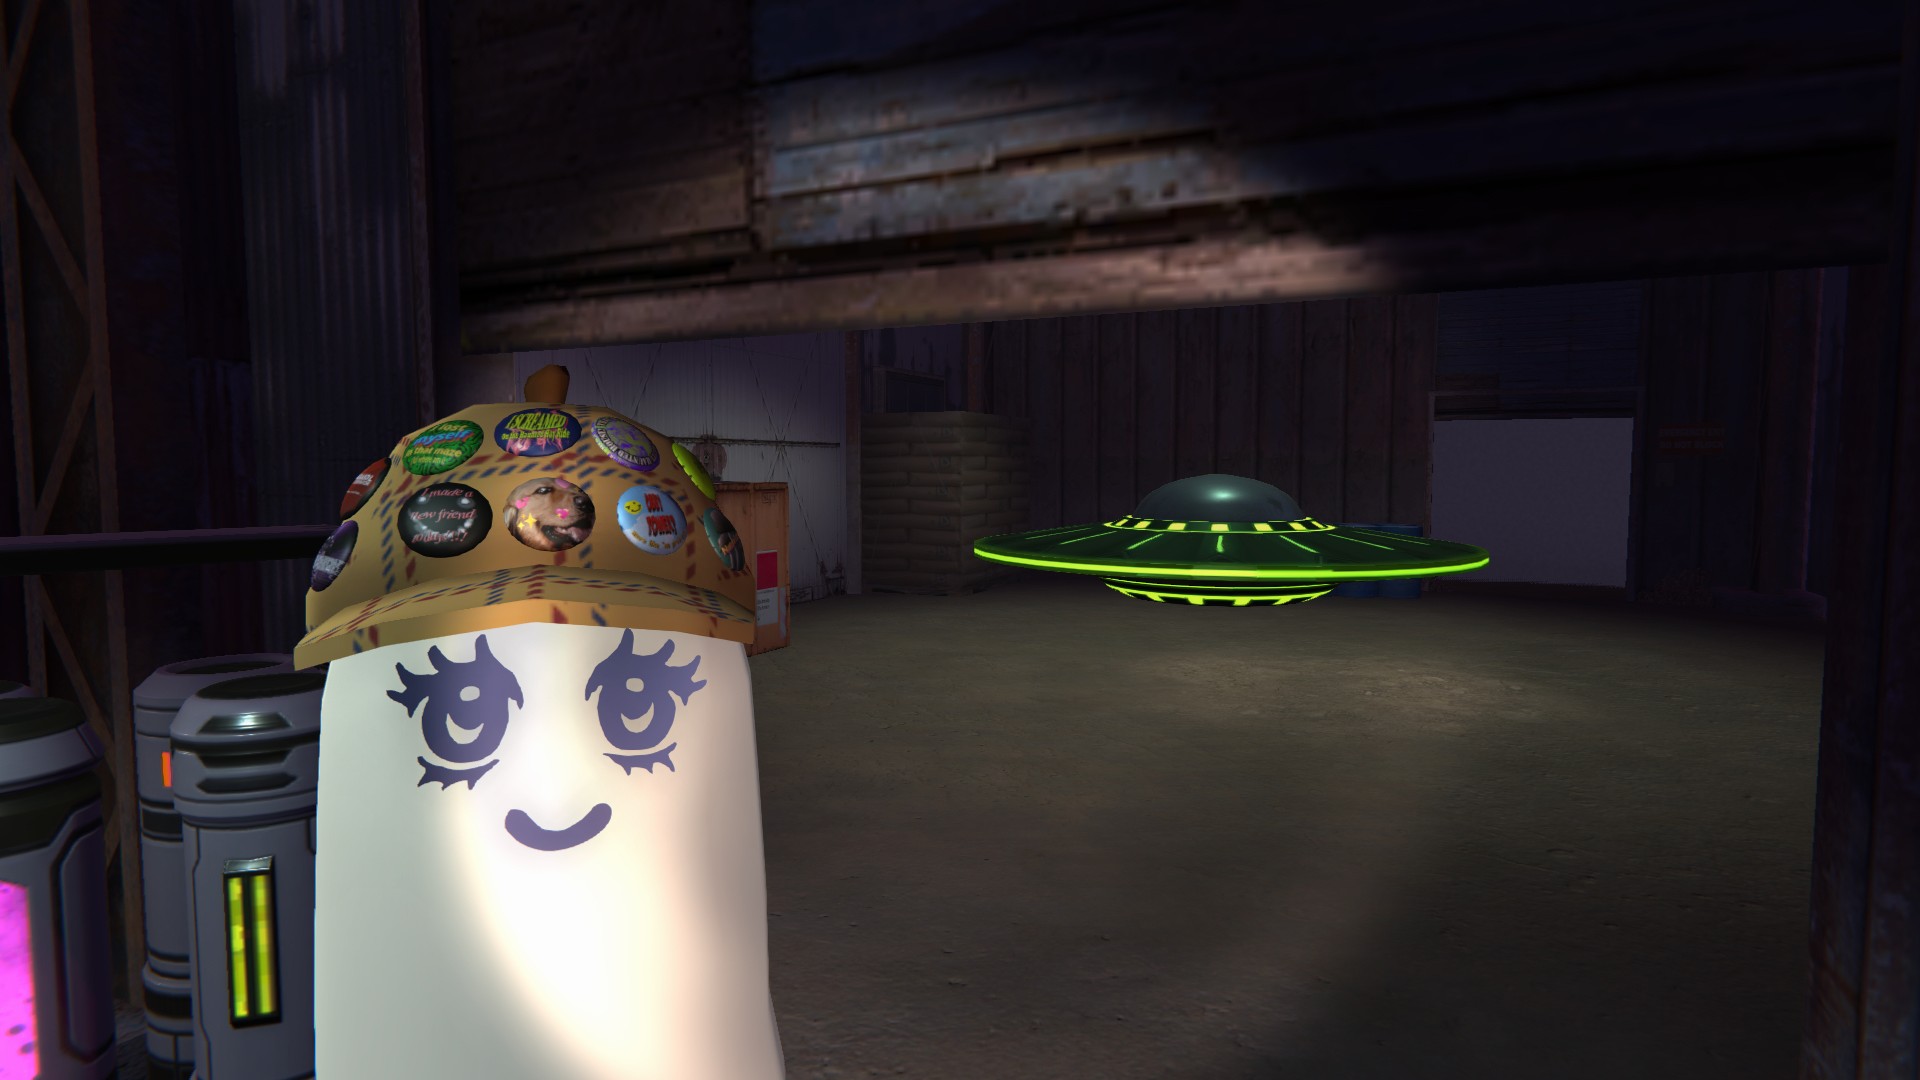
Towards the back of the new room, you’ll see a “DO NOT FLIP THIS SWITCH” sign… Click the light switch under it which will open the garage. In the garage, a UFO will be sitting if someone hasn’t taken it yet. There is only one UFO per server so if someone is already using it, it won’t be there. There is another switch at the back to open to exit.
Parasol Corporation
This involves finding a way up to the tower on the highest building. Find your way there and you’ll be able to get a pin. The name of the pin itself may give you an idea of what you’ll end up using to find your way up there.
You want to make your way to where the theater is to start. You’ll essentially be turning to the right, jump on the blue car to get up the platform (there are also stairs– this is all to the right side of the town) and then cross the planks to get to the roofs of the houses across from the Theater.
Don’t jump across though– move forward to see a red umbrella/parasol. Use it to jump to the houses across the street. Walk across them to try and land on the blue one… Which from there you need to land on the green one across to get on the next roof. You’ll then walk across to the yellow one to use to get to some wooden planks with stairs to the right. Simply go up the stairs and across the roof to get to the pin box in the gazebo-esque tower.
Once again, if you’re struggling, the thing you unlock through the Aliens Pin can help again.
Theater Friend and Dog
To get started, simply look around this room. Once you’ve gotten a certain area unlocked and another item, you can head to the bottom of the theater to find where to go next.
Now, for the more specific things:
-The bulletin board mentions the bathroom code is 21323, but there isn’t any keypad for the bathroom door.
-On the back counter of the snack area is a set of keys. Grab them to open the bathroom door.
-Opening the stalls will reveal numbers. Flush the toilets in the stall that matches the numbers of the bathroom code to redeem another set of keys.
-Head into the theater and make your way all the way down the stairs. To your left is a Restricted area– use the keys to open the door and then pick the difficulty you want for the keypad.
Depending on the difficulty, you may be followed by a monster.
You’ll get a crowbar to remove the wood on the door. There is also additional lore on the bulletin board along with a big hint: Four Tapes. That is what you need to find to unlock the next area. You can only hold one tape at a time so you want to put each tape in the TV you’ll find as you find them. The TV is indicated by a grey mat on the floor. Some doors will only unlock when opened from the other side.
The big room itself is a maze. The tapes can be found:
-Inside a room with a cabinet (you can open it) near a phone.
-On a table with a lamp
-In a room with a bunch of boxes to the right.
-You’ll find another crowbar to open the door to find the last tape in the bathroom.
After putting all the tapes in, a hall will open behind the TV. Head through to find a room with a bunch of stairs… Head all the way down to find another room which is a bit of a jump puzzle– make your way to the red door in the back and enter it.
Once again, head down the hall to the Projector room!
Depending on your difficulty, you’ll either see a Dog or the Monster that was chasing you. Whichever one is there determines your pin:
-If the Dog is there, you get a cute pin of the dog’s face!
-If the Monster is there, you get a “I made a new friend” pin!
You can get both though! Simply hit escape to bring up the settings, hit the three dots for more and then click “options”. Pick “Accessibility” at the bottom and either enable or disable monsters (essentially the opposite of which you currently have set) to grab the other pin! You can switch it back right after.
The Haunted Mansion
Simply head straight down the street of the town and to the left rather than turning to the right to find your way to the Mansion. Like with the theater, choose the code on the notice for your preferred level of spooky.
To the right is a Crystal Ball which you can use coins in the mansion to get hints while to the left is a “Lost” Chest– any items that may disappear will go there. The notice in the chest will also give you your first clue to get started.
This is essentially a giant escape room (ignoring that you can leave at any time)– each puzzle will lead you to the next area and puzzles. If you need more specific help, keep reading.
- The notice mentions how they don’t seem to care about security. Put in the code “1234” to open the safe which opens the Red Diamond door next to it.
- Around the kitchen are various tiles that make a puzzle. Each piece has a number on it and putting them in the right place tells you the code order. If you’re having trouble finding the tiles, a lot of people miss the tile on top of the upper cupboards to the right.
As for the one number missing, it’s the number that hasn’t been used yet like playing Sudoku. Thus, the code is 489627351 which can be used to open the safe in the Kitchen. - From here, you can either open the door to the Dining Room (which does not require a key) or head across the way to open the Triangle Door. For ease of access, I’m going to start with the dining room. Across the way, you’ll find a door you can open to lead to the main hall plus a notice on a table that tells you how to solve the puzzle in this room.
Essentially, you need to position the horses on the cabinet to make SEWN by clicking them– so, from left to right, the first horse should face forward, the second horse should face right, the third should face left, and the last should face backwards. This will let you unlock the door to the upstairs, but we’ll get to that in a bit. - Next, head to the Triangle Room. There are two doors here, but you can only open one right now– the one to the left that leads to the Basement. You’ll be coming back here for multiple puzzles. Alas, there is only one puzzle you can solve for now. Those arrows aren’t pointing for nothing.
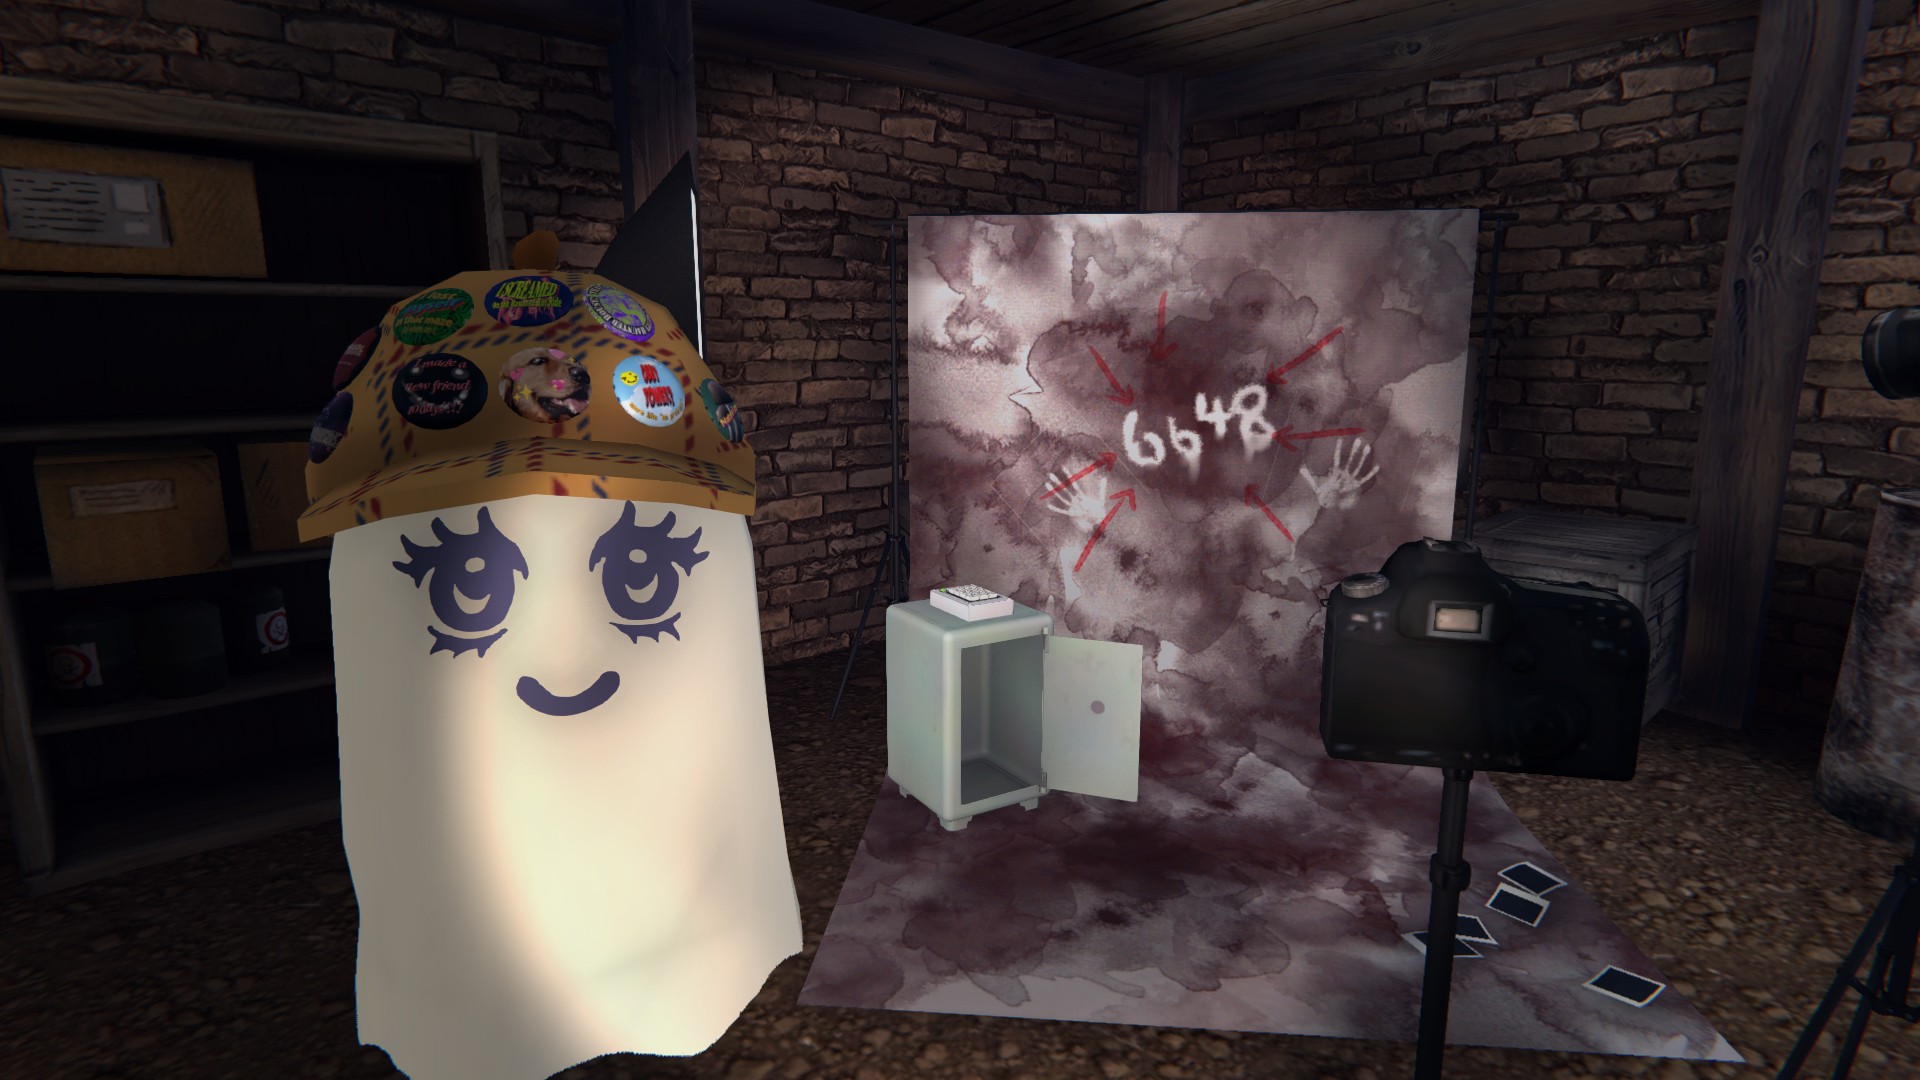
Take a picture of the photographer set-up and view your photos (N) for the code to be revealed: 6648.
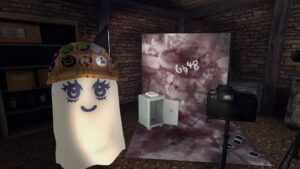
You can use it on the safe to get your next key: A Square with a line through it which unlocks the other door in the Triangle Hallway.
- You’ll see six gems on a table of various shapes and sizes. You need to find four different solutions in order to unlock the door here. Simply hit the ? button to submit a solution– if it’s right, a light will turn green. You can do them in any order (and forward or back).
- Rainbow Order – Red, Orange, Yellow, Green, Blue, Purple
- Size order – Yellow, Red, Orange, Green, Blue, Purple
- Faces (number of sides) – Orange, Yellow, Red, Blue, Purple, Green
- Sound Waves/Pitch (You’ll see them on the machine when you pick one up and also hear the sounds– you want to go from quickest/highest to slowest/lowest) – Red, Yellow, Blue, Green, Purple, Orange
- The door will open here, but you need a bit more information first so head upstairs to work on the puzzles there before we make our way back down here.
- You can do the doors in any order upstairs, but we’ll be starting with the leftmost one. Essentially, the screensaver will show you Chess moves (the red screen starting the cycle over). You need to match the move types to the number position of each piece on the chessboard. The order is: Bishop, Pawn, Queen, King, Knight, Rook
Thus, the code for the safe is: 785321. You’ll get the Moon Key which can open the balcony door in the dining room. Go out there and grab the notepad which is used for a basement puzzle. I’d recommend putting it on a cabinet for now as you will end up having more items to grab for a puzzle in the basement. - In the other bedroom upstairs is a PC with shapes along with a pair of Scissors for you to put with the notepad. This is essentially a Rock Paper Scissors simulation and you must pick the symbol that would defeat the one on screen. (You may recall the symbols being on the Gargoyles in the basement as well). The O symbolizes Rock, the X symbolizes Scissors, and the Square symbolizes Paper so O beats X, X beats Square, and Square beats O. Once you finish the simulation, the music box will reveal the key to the room across the way.
- The main puzzle in the room is hinted by the wall where you need to figure out the missing numbers to open the safe.
Essentially, you want to add the digits together to make 10.
So 5 + 5 = 10, 4 + 6 = 10 and so on so forth. Put 5679 into the safe to get the final element for Rock Paper Scissors: The Rock. Before you head down to the basement though, there is something else you can interact with in this room for another puzzle… - Go to the side of the cabinet on the backwall and click where two handprints are to push it aside. This will lead you to a creepy room with a safe and an interesting item on the wall with an eye around a number. You’ll need to figure out the safe combination from it.
Essentially, each time you turn away from it and back, it has a chance to switch to another number. Keep doing this until you see all four numbers to get the combination for the safe.
The solution is 4686 which will get you a hand– another item for a puzzle in the basement. - Before going to the basement (unless you wanted to drop off the items you got there), you now have the information to do the puzzle through the door that opened in the Gem Room. Just like the bedroom puzzle, you need to figure out the missing digit to make them all add to 10 to open the safe in the room. The answer is 4208. This gives you the key to the eye door in the kitchen.
- Head to the basement to do the Gargoyle Puzzle. Remember, it’s essentially Rock, Paper, Scissors.
You want to put the paper in front of the Gargoyle with a Circle on its head, the rock in front of the Gargoyle with an X on its head, and the Scissors in front of the Gargoyle with a Square on its head. This will open the safe by them to get to the key for the yard area which is the little cellar above the ladder right next to them. Be sure to note down the number on the blue notice: 0513 as you will need it for part of the puzzle there. - Opening the shed will give you a clue that this works the same way as the bedroom puzzle. However, if you add the digits, you may realize you have to do something slightly different…
The other big clue is the grave with a completed date on it: 1883– adding each digit together gives you 20. You need to fill in the missing digit to add for each to get to 20. As for the order of the numbers… It’s alphabetical with the first one being in the shed.
The combination for the red safe, which is found through the eye door in the kitchen, is: 6998. In it is another hand for the basement. After moving it to the basement, you can open the door in the red safe room for several more puzzles. - The only door you can open to start with is the door across the vent so head inside to see your first puzzle here along with a clue to another one. Focus on the easel first.
Essentially, you need to find the clocks on each floor and what time each clock face is saying and then put them into the device on the opposite wall that says “Tick Tock”.
The top floor clock is 7:00 (in the first bedroom), the main floor is 10:00 (in the dining room), and the basement is 19:00 (aka 7PM) so put in 7,10,7 which will open the cupboard to a secret room with various symbols on the walls. You need to figure out how each symbol correlates to the pie chart to figure out the code. The pie is the numbers to the code and the dashes are the other and you need to use the other pie charts to figure out the order.
Once finished, you should get the solution: 51324. Entering that into the keypad will open up a small opening, but you need to be small to enter so let’s head back to where the clock puzzle was. - Now it’s time for the maze puzzle. You need to remember the directions of the maze and put them into the Mirror lock to open the mirror and reveal a secret passage.
The answer is: Up, Left, Up, Right, Up, Right, Up, Left, Up, You can now jump through the mirror on the other side to interact with a mushroom, but first, the other lock on the door… Simply mirror what you did with the first lock: Up, Right, Up, Left, Up, Left, Up, Right, Up. This gives you a hand for the basement puzzle. Now, after moving the hand somewhere safe, come back and use the mushrooms to get through that tiny window. - Through the tiny window is a bonus puzzle. Putting in your computer’s current time will unlock a cute sneak peek Easter egg. Now, turn yourself big, grab the hand and put it in the little window, turn small again, and grab the hand to move.
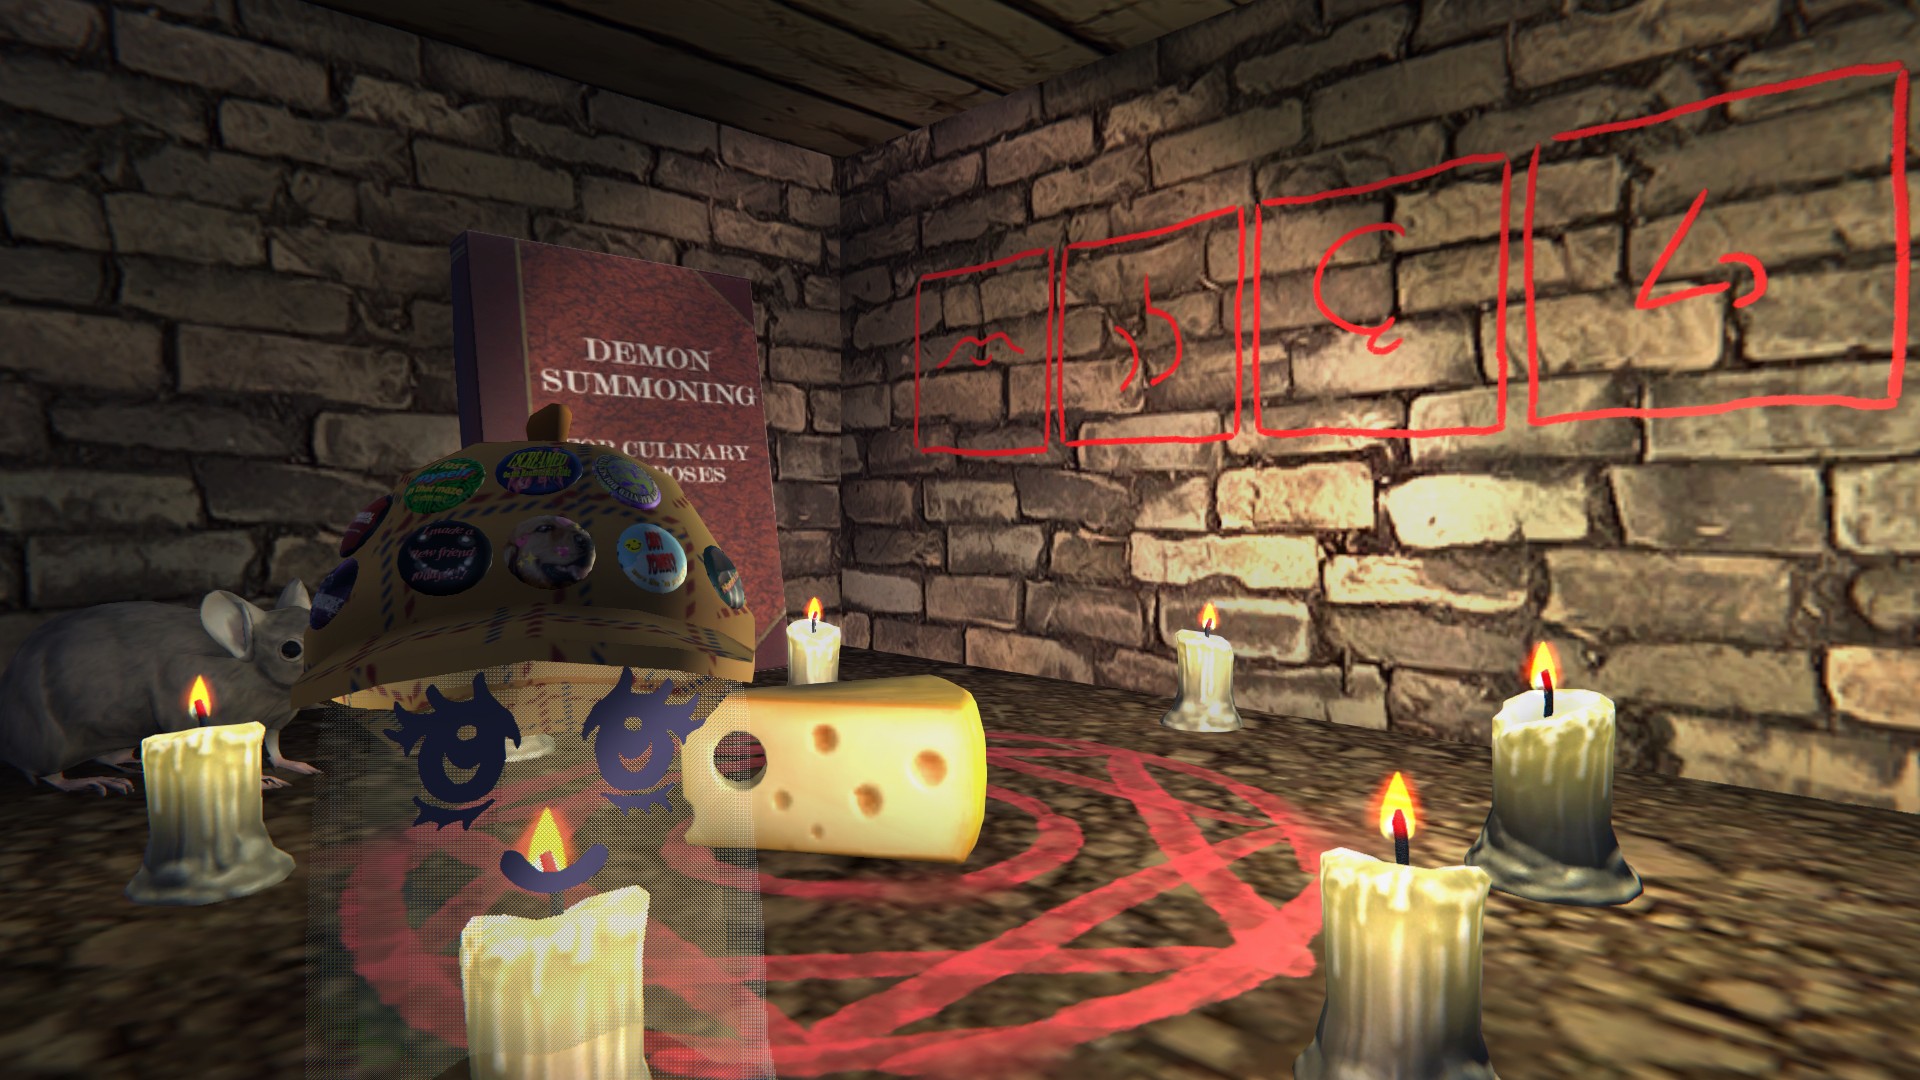
- As for how to order the hands… Make yourself small again to go through the vent to find some Mice with a summoning circle. On the wall is the solution for how to place the hands.

- Leave the vent, make yourself big again with the mushroom in the Mirrored bathroom, and then head back to the basement to place the hands in the order instructed in the Mouse vent. A Wall will open up to your right and after going down a very long tunnel, you’ll find Mayor Bones!
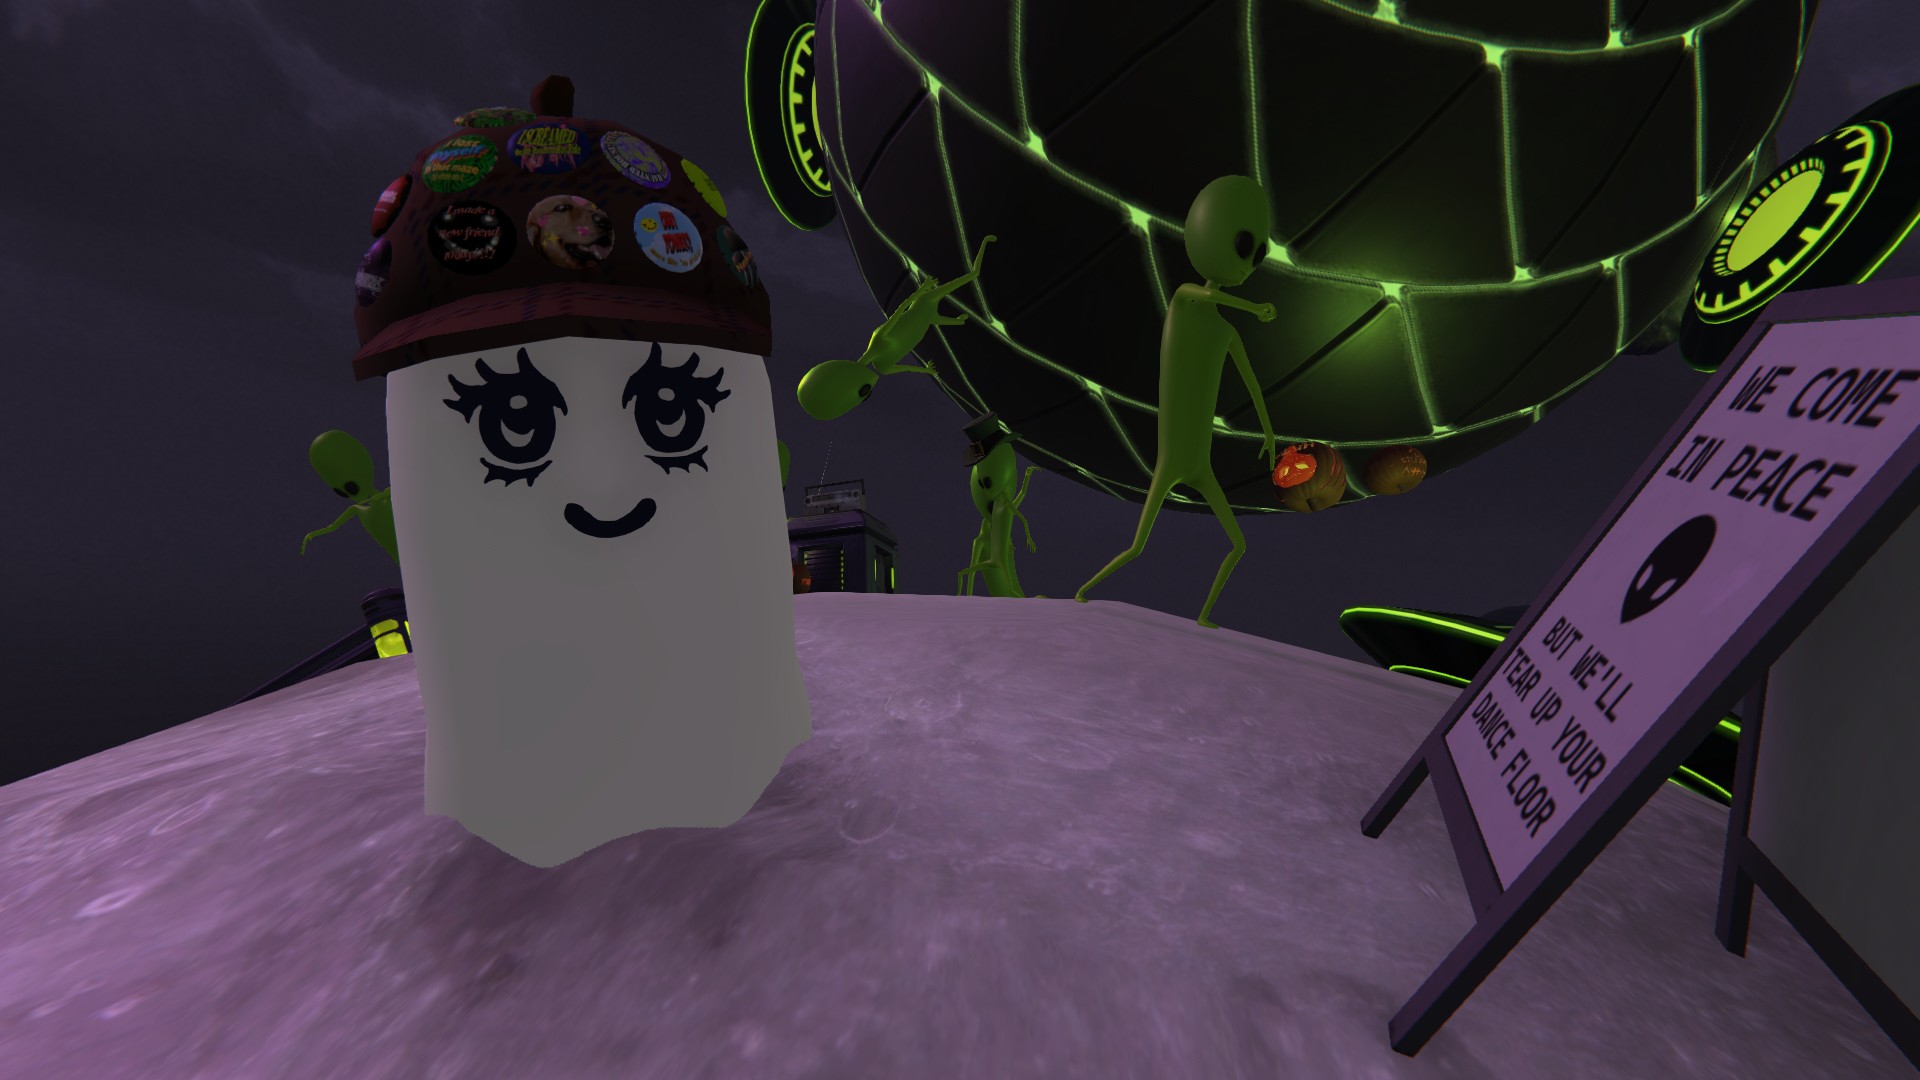
The Moon
If you look into the sky, you should see a big Moon (which I believe replaced the floating arrow). While you could fly to it using a mushroom, that technically wouldn’t let you get the pin so you need to use the UFO you can find after getting the Aliens Pin. There is only one UFO per server, though, it respawns after about 5 seconds of not being used. Regardless, you may want to try an emptier server (unless the person in it is giving rides) to get yourself up there.
Once on the Moon, go around to the Alien Rave. You’ll see a giant round mothership that has its own gravity. Jump onto it and follow along the ships and asteroids to get to a Pin Box in this little Space Obstacle Course.
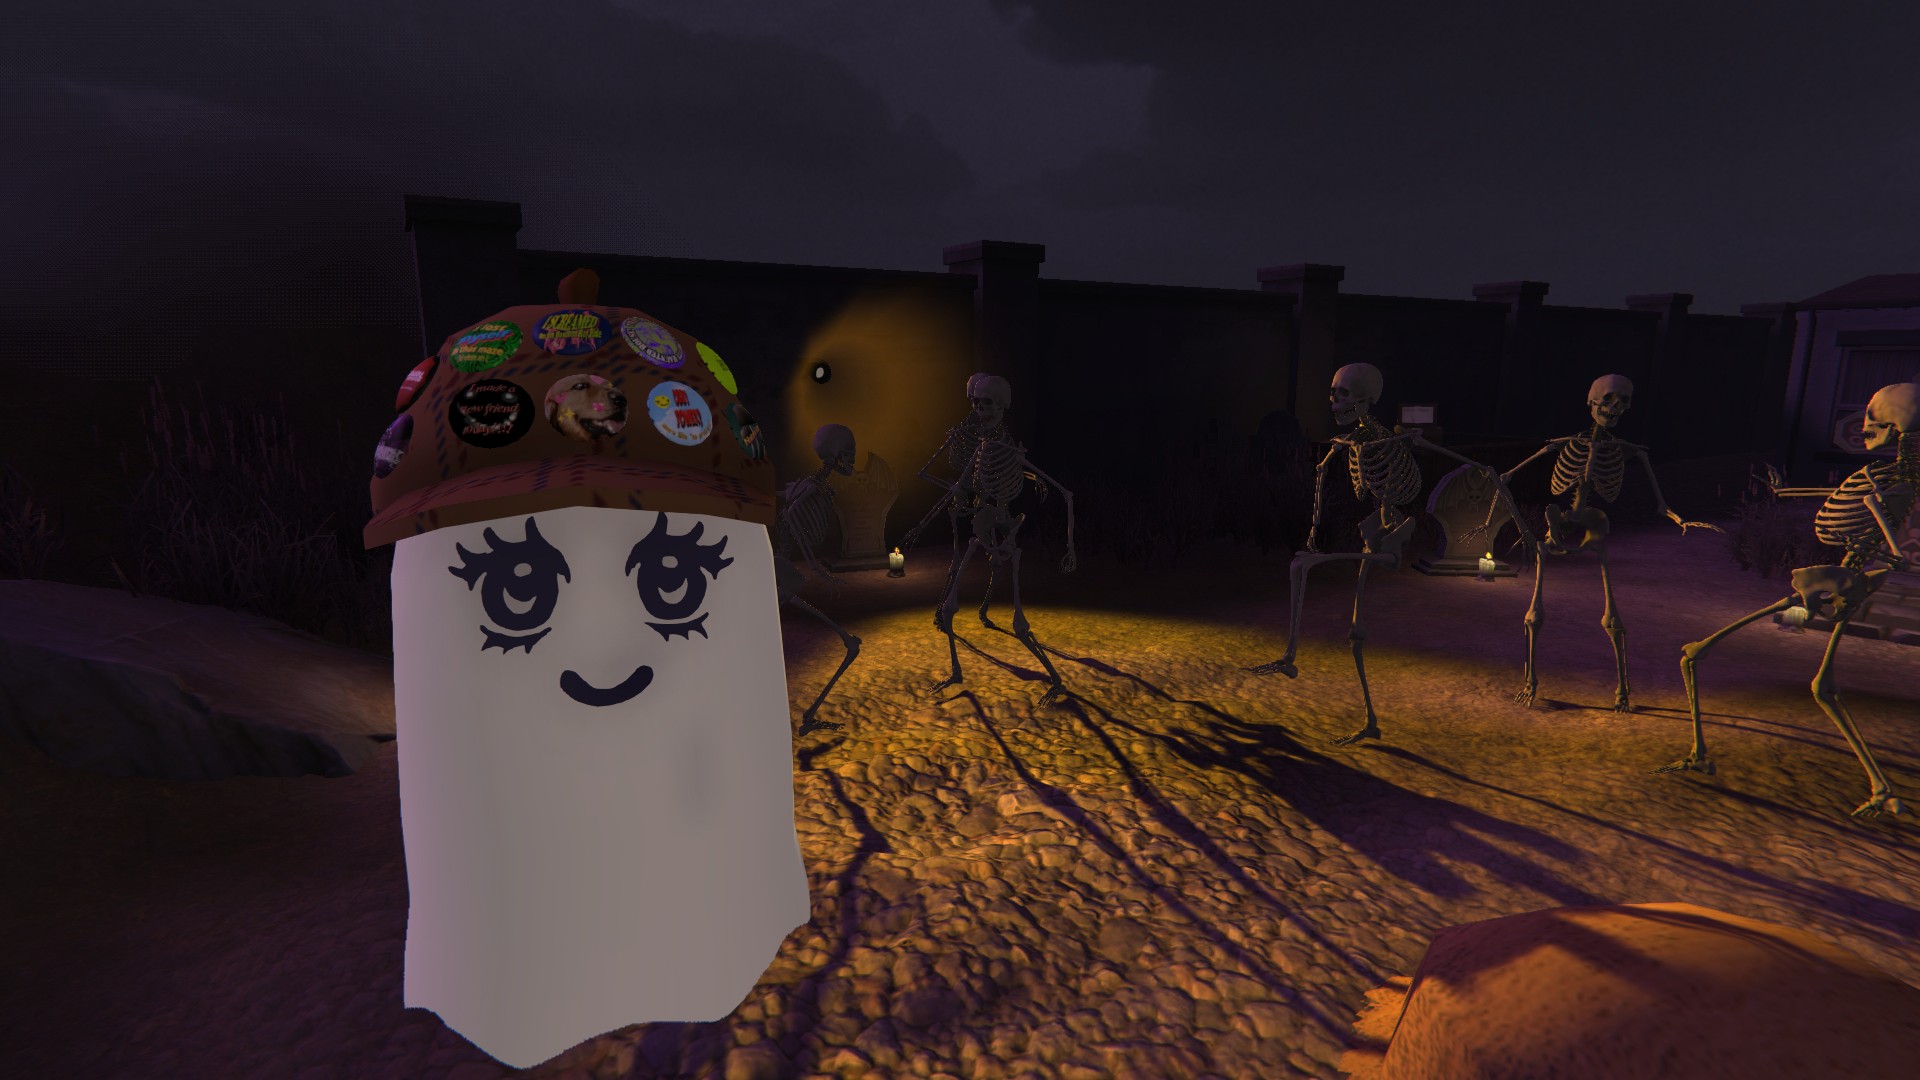
The Rave
This pin is only available on Halloween when the Skeletons gather together to dance. You can find it behind some buildings in the town close to where the Tunnel is in the back.
Behind them is a table with a pin box on it! Simply click it to get your “Rave Beyond the Grave” pin.

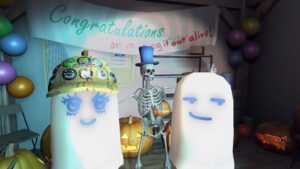
Congrats!! You’ve earned all the pins. Have fun hanging out with friends and carving pumpkins :)